1.1. Mapping Webots environment with ROSbot 2R teleoperation
1.1.1. Background
This document explain how to map a Webots environment with the teleoperation of a ROSbot 2R robot from Husarion.
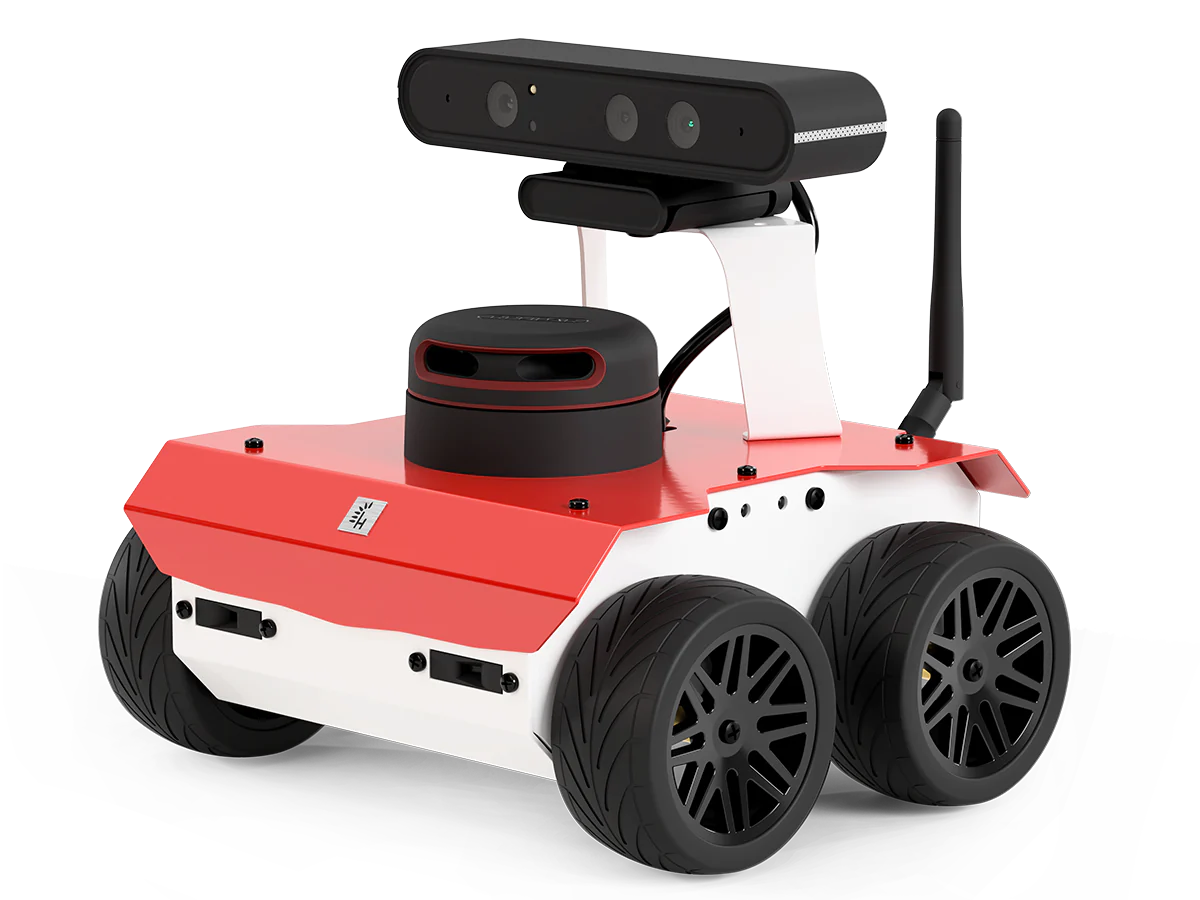
In this demo we will use the simulation of ROSbot 2R - an autonomous mobile robot by Husarion, designed for learning ROS and for research and development purposes. It is an affordable platform that can serve as a base for a variety of robotic applications, including inspection robots and custom service robots. The robot features a solid aluminum frame and is equipped with a Raspberry Pi 4 with 4GB of RAM, distance sensors, an RPLIDAR A2 laser scanner, and an RGB-D Orbbec Astra camera.
Webots is an open-source three-dimensional mobile robot simulator. It is the simulator selected for simulating the Husarion environment and the ROSbot. It is based in Qt, a physics engine (ODE fork) and an OpenGL 3.3 rendering engine. Please, refer to Webots for more information.
RViz2 is a 3D visualization tool developed for ROS 2. It allows the display of ROS 2 Topics and the extension of its capabilities through the development of plugins.
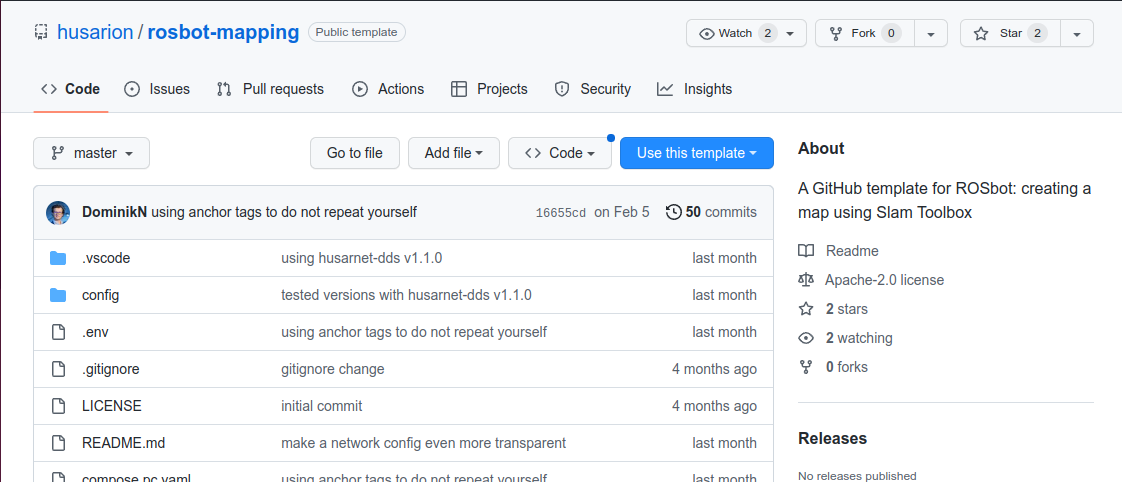
rosbot-mapping is the GitHub repository from Husarion where you can find the Docker compose and configuration used in this demo. All its contents are explained below.
1.1.2. Prerequisites
This tutorial covers the first steps of setting up a ROSbot 2R simulation in Webots. For this task, we will use the Docker Compose from the repository mentioned above. Therefore, it is necessary to have Docker and Docker Compose installed. If you do not have them installed, please follow Install Docker on Ubuntu and Getting Docker Compose installation guides.
High-performance computing is needed for the simulation. It is necessary to process such a large amount of data and to perform complex calculations at high speed. This requires to use NVIDIA Container Runtime. Ensure that you have NVIDIA GPU and NVIDIA Container Toolkit installed, otherwise, follow the installation steps here.
Add the rosbot-mapping GitHub repository into your workspace directory with the following command:
git clone https://github.com/husarion/rosbot-mapping
1.1.3. ROS 2 Packages
The ROS 2 Packages involve in the demo are the following:
- webots_ros2_husarion
It is a ROS 2 package prepared to start Webots with Husarion environment.
- slam_toolbox
It is a ROS 2 package that provide a set of tools for 2D Simultaneous Localization and Mapping (SLAM).
- nav2_map_server
It is a ROS 2 package from Navigation that provides maps build with the information of the sensors, in this case, the RPLIDAR A2.
- teleop_twist_keyboard
It is a ROS 2 package that provides a node which takes keypresses from the keyboard and publishes them as
Twistmessages.
1.1.4. Environment review
The Docker Compose used for the simulation is compose.sim.webots.yaml.
You can find it here.
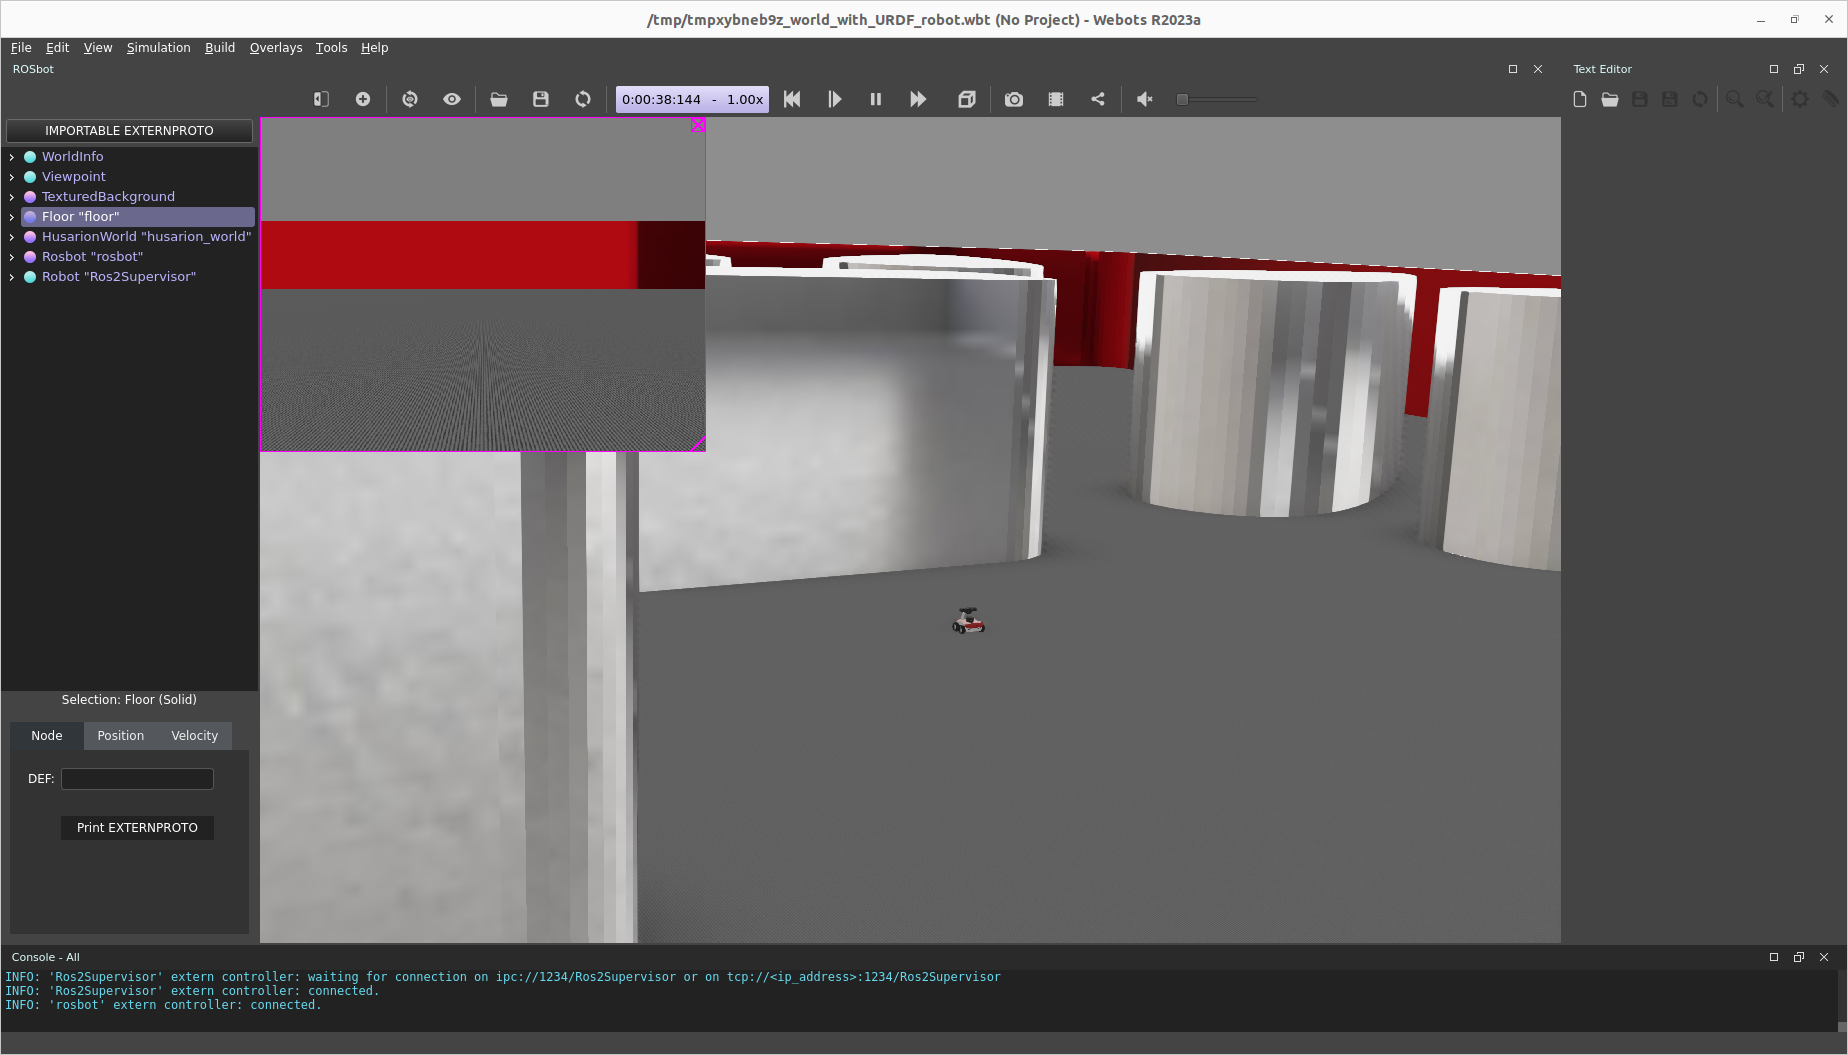
The Docker Compose launches the following containers:
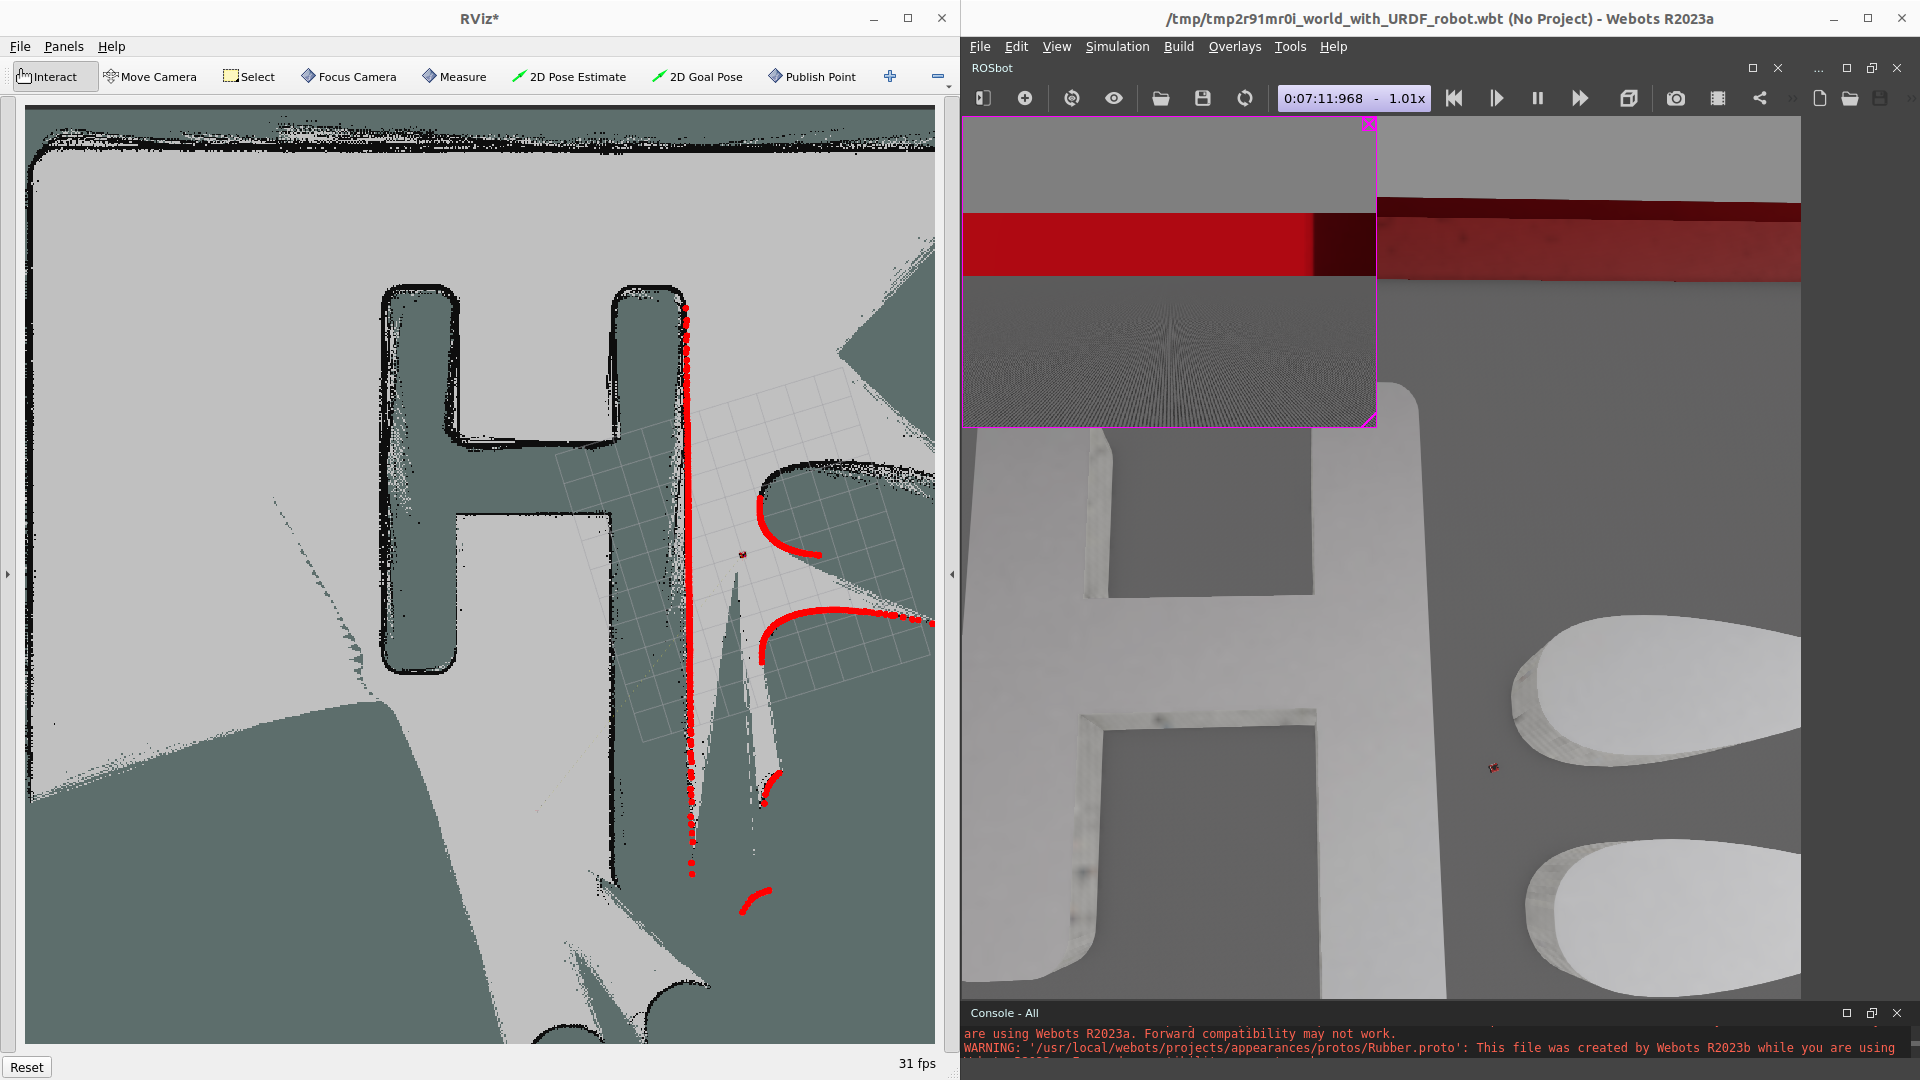
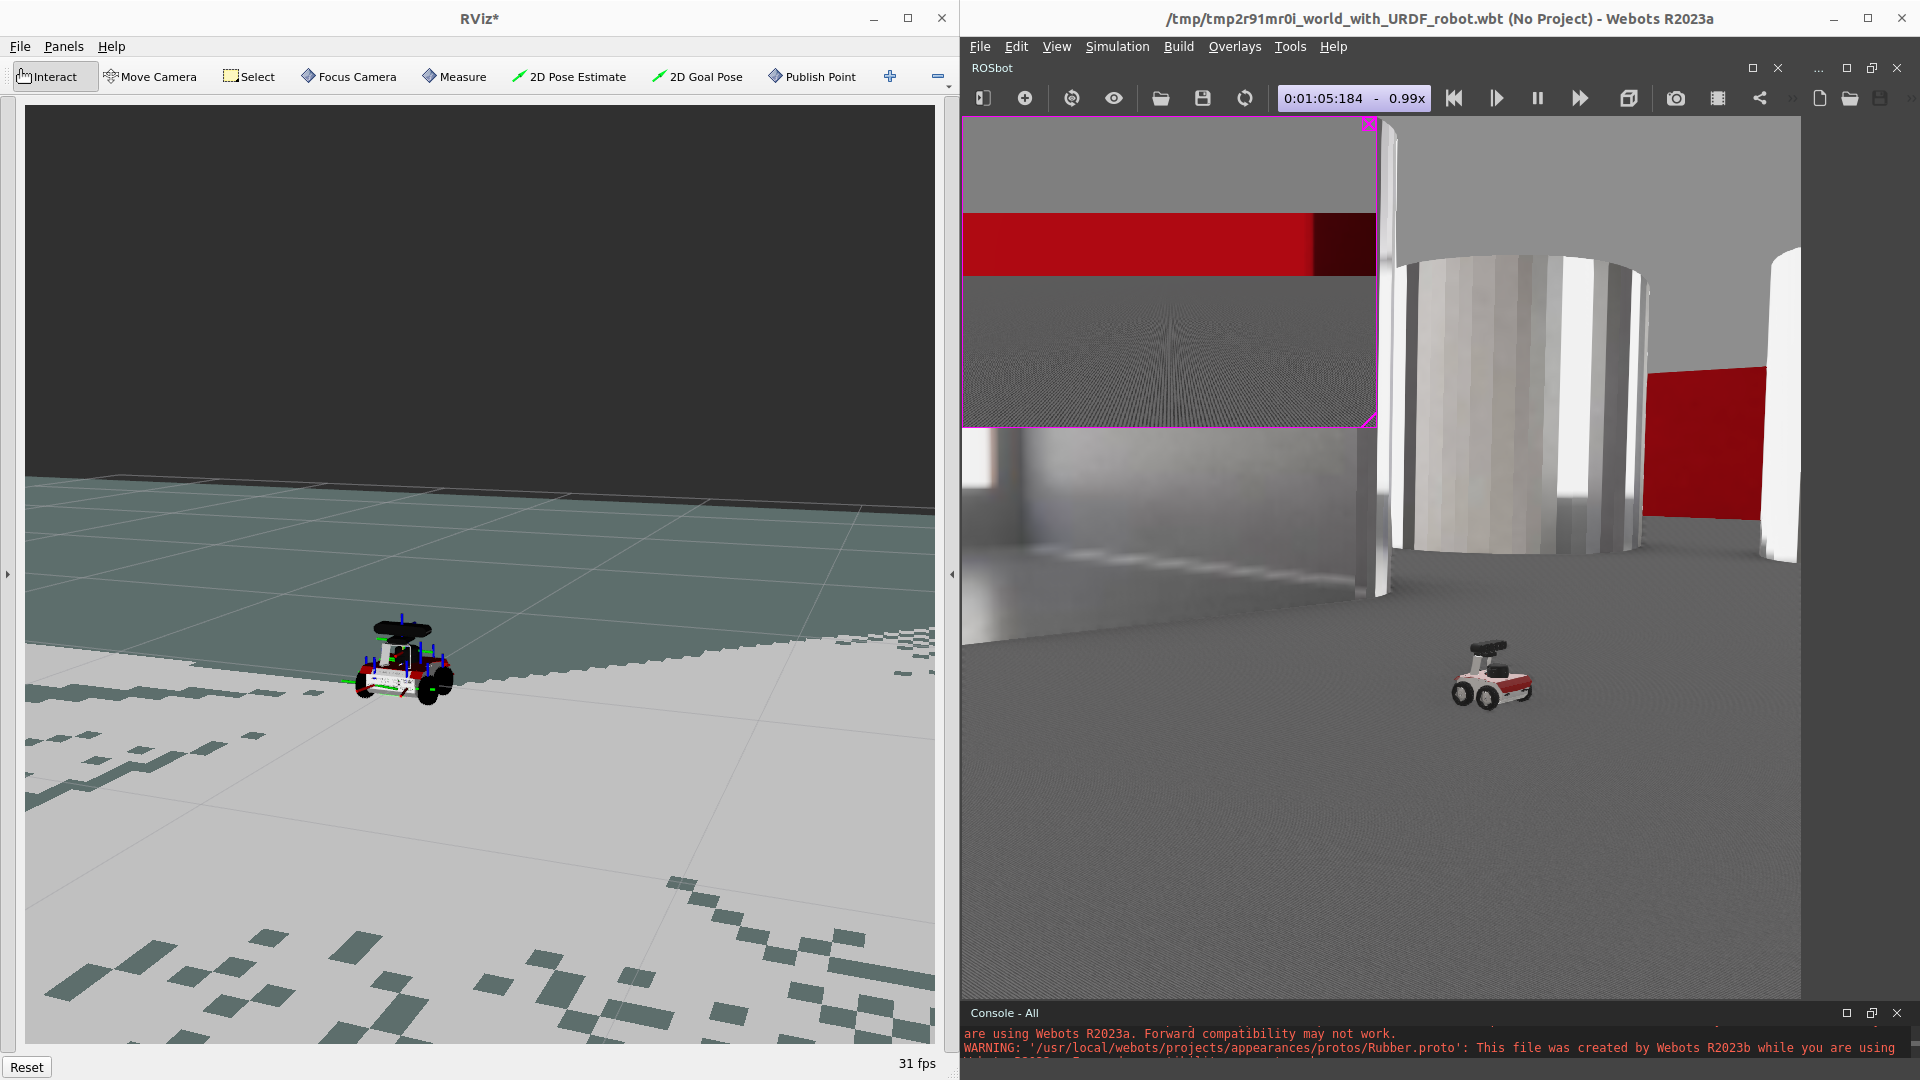
rviz: is the container that is responsible for starting up RViz2 with the appropriate configurations.
rosbot: start the environment and the robot in Webots.
mapping: will be responsible for locating the robot and creating a map using the odometry and LIDAR data received from the sensors.
map-saver: is responsible for the storage of the map that was previously created.
The following lines apply to all containers and mean that everything is running in host.
x-net-config:
    &net-config
    network_mode: host
    ipc: host
    env_file: net.env
Below are the GPU configurations that apply to RViz2 and Webots, as they are graphical applications.
x-gpu-config:
    &gpu-config
    runtime: nvidia
    environment:
        - DISPLAY=${DISPLAY:?err}
        - NVIDIA_VISIBLE_DEVICES=all
        - NVIDIA_DRIVER_CAPABILITIES=all
Then start the container definition.
The first thing you can see is the rviz container, which is started with the configuration file found here.
The plugins used are defined in the configuration file.
Among them, for example, we find the plugin from the navigation stack 2D Goal Pose, which allows the user to send a target by setting a desired pose for the robot to achieve.
For the purposes of this tutorial, however, we need only pay attention to the Displays and familiarize ourselves with the information they provide.
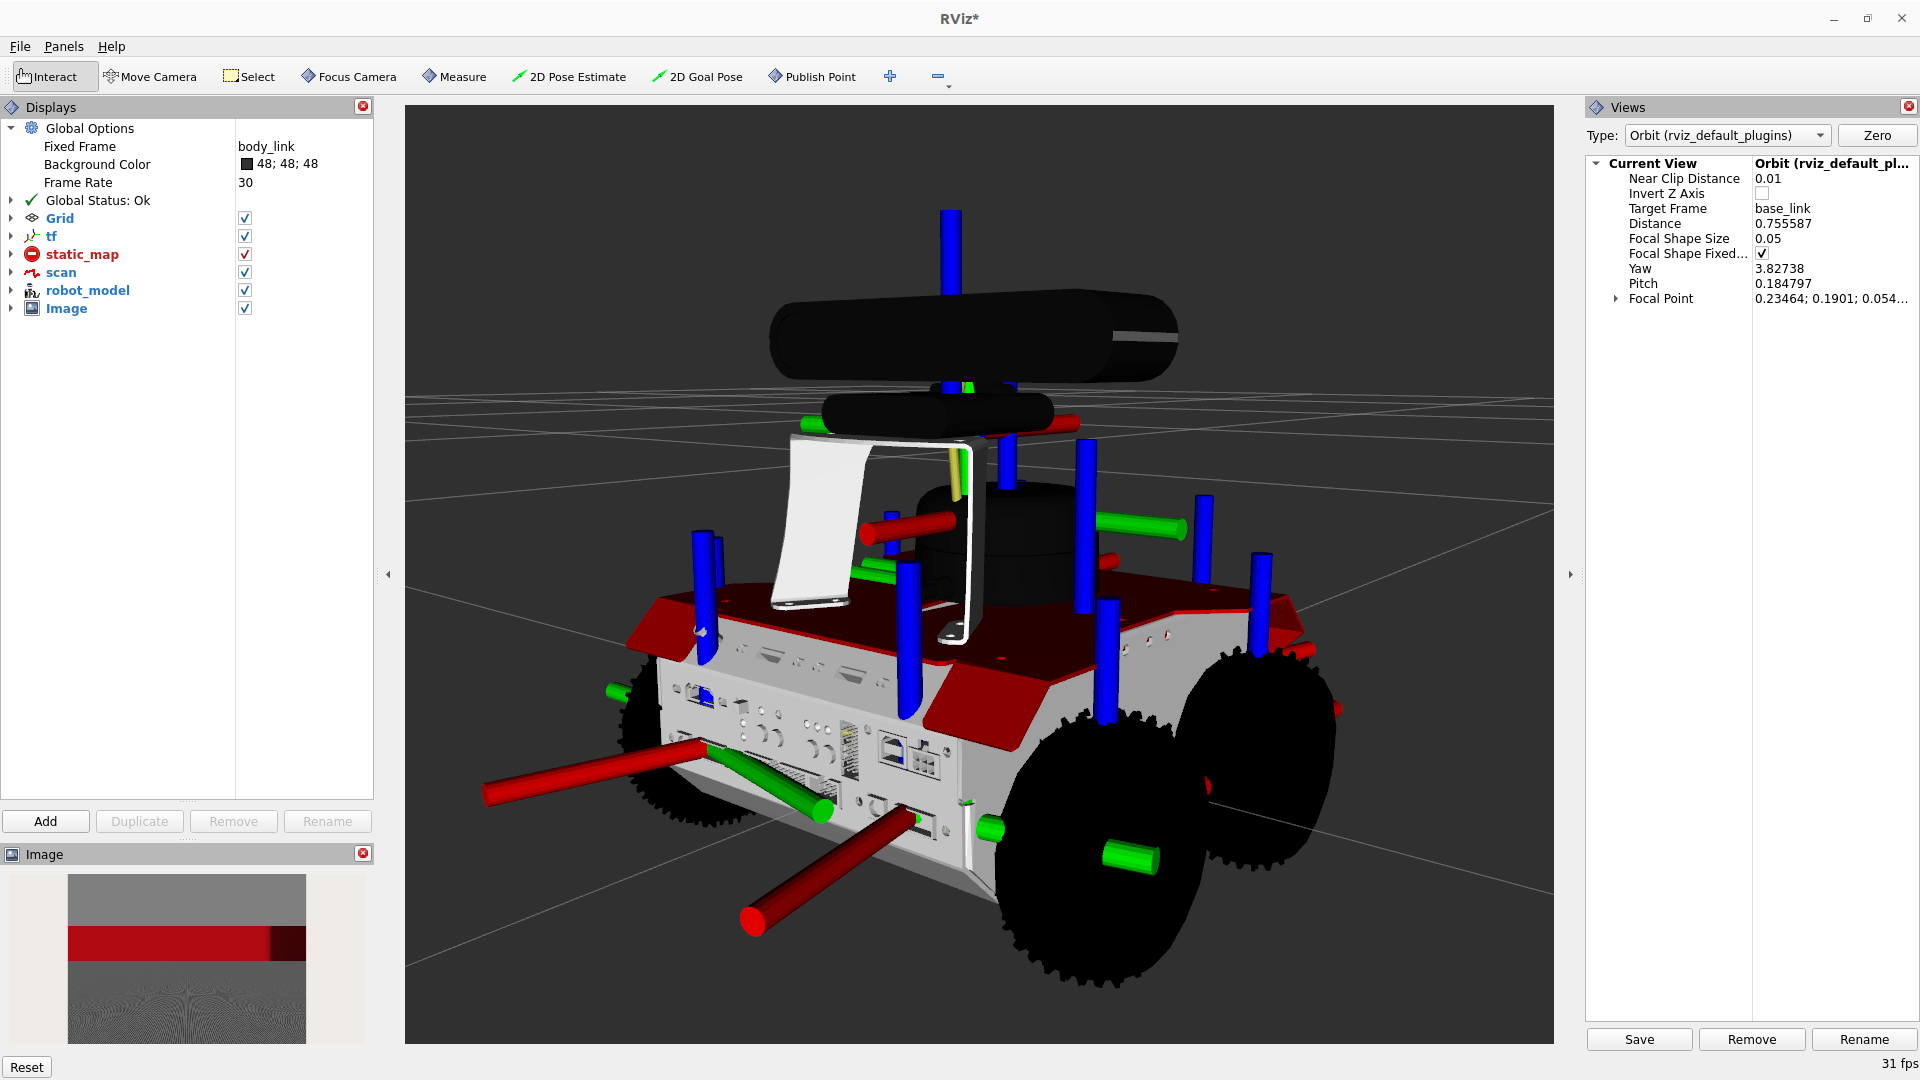
Between them you can see the display of the map created in static_map and the information from the LIDAR in scan.
services:

    rviz:
        image: husarion/rviz2:vulcanexus-humble-11.2.5-20230308
        <<: [ *net-config, *gpu-config ]
        container_name: rviz
        volumes:
        - /tmp/.X11-unix:/tmp/.X11-unix:rw
        - ./config/rosbot.rviz:/root/.rviz2/default.rviz
The following service defines the rosbot container.
It launches Webots with the robot and environment of choice.
It also starts the nodes responsible for publishing the robot’s state, as robot_localisation or robot_state_publisher.
rosbot:
    image: husarion/webots:vulcanexus-humble-2023.0.1-20230301
    <<: [ *net-config, *gpu-config ]
    volumes:
    - /tmp/.X11-unix:/tmp/.X11-unix:rw
    command: ros2 launch webots_ros2_husarion robot_launch.py robot_name:=rosbot
Next, the mapping container will start up the slam_toolbox node with the configuration file, which can be found here.
use_sim_time set to True define that must use Webots clock.
mapping:
    image: husarion/slam-toolbox:vulcanexus-humble-2.6.4-20230228
    <<: *net-config
    volumes:
    - ./config/slam_toolbox_webots.yaml:/slam_params.yaml
    command: >
    ros2 launch slam_toolbox online_sync_launch.py
        slam_params_file:=/slam_params.yaml
        use_sim_time:=True
Finally, the map-server container is responsible for saving the map created by the previous container every 5 seconds.
It will store the map in your ./maps directory.
map-saver:
    image: husarion/nav2-map-server:vulcanexus-humble-1.1.5-20230228
    <<: *net-config
    volumes:
    - ./maps:/maps
    command: bash -c "while true; do ros2 run nav2_map_server map_saver_cli --free 0.15 --fmt png -f /maps/map; sleep 5; done"
1.1.5. Execution
First, it is necessary to launch the docker compose compose.sim.webots.yaml that will activate the containers rviz, rosbot, mapping and map-saver.
Start the containers in a new terminal:
xhost +local:docker
docker compose -f compose.sim.webots.yaml up
In order to teleoperate the ROSbot with the keyboard, launch the teleoperation node, teleop_twist_keyboard, inside the rviz docker container previously created.
Use the commands below in a second terminal:
docker exec -it rviz bash
ros2 run teleop_twist_keyboard teleop_twist_keyboard
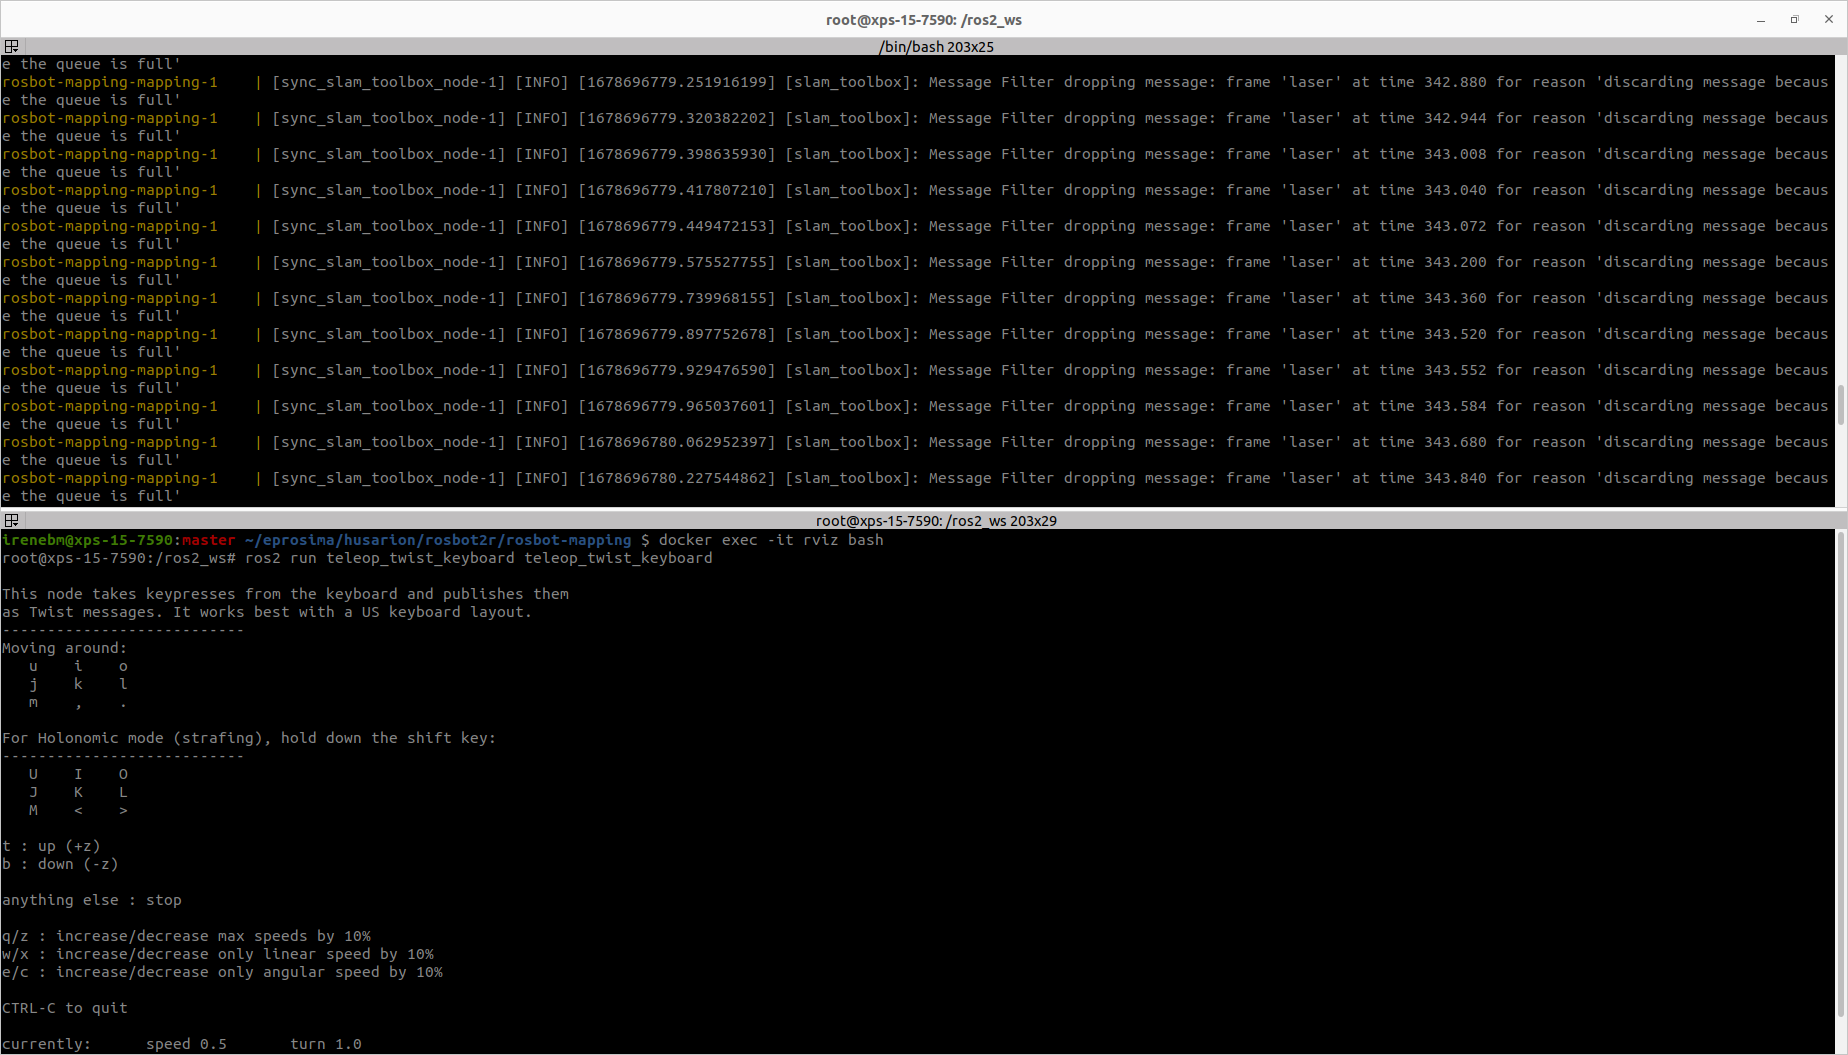
Now you can move around the environment with the keyboard and create a map!